|
|
Post by rockhound on Oct 31, 2011 4:20:33 GMT -5
Here's a few pictures of my progress so far... These are the test pieces that are rolled up "fingers" of pure clay ready to dry out and fire, to test for strength. 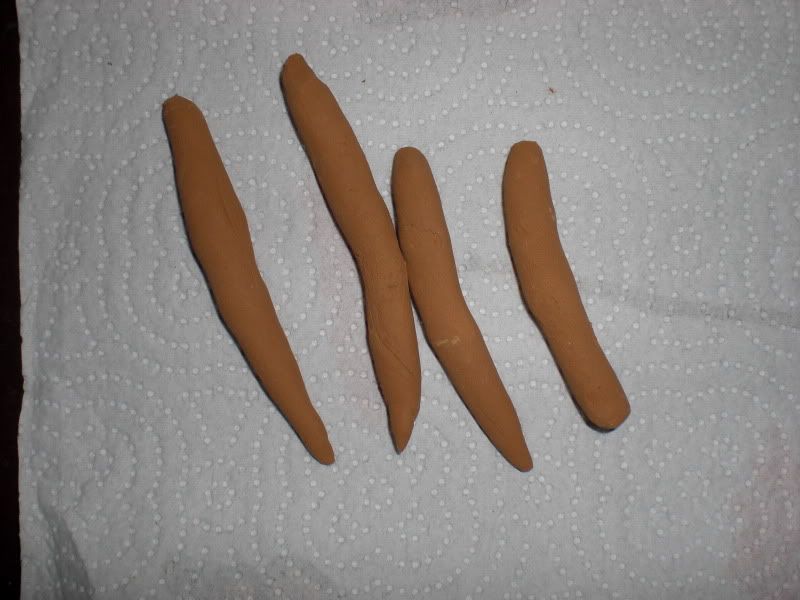 This second pic is just balls of clay I put up to give me a break for a couple days. I wrapped them in Saran, then in a zip bag to keep the AC air from drying them out too fast to work on. Later on that fast drying will be a help. 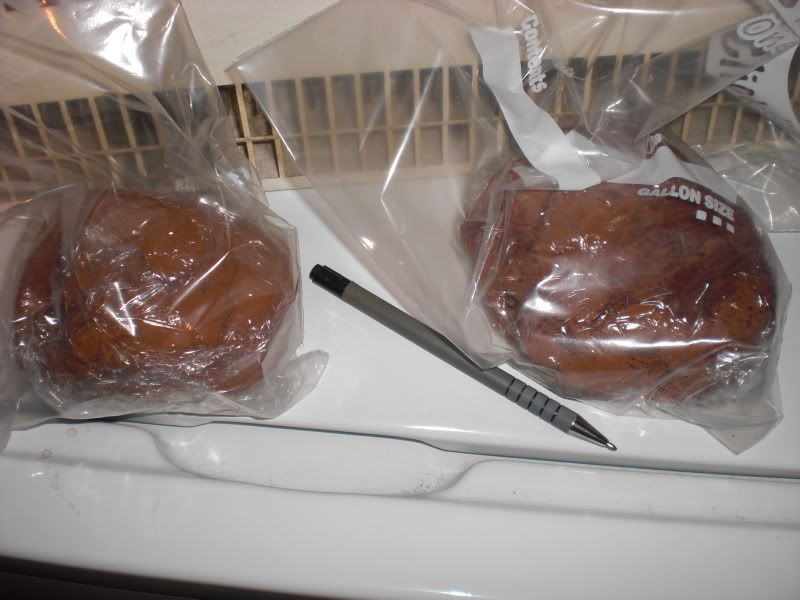 |
|
|
|
Post by rockhound on Oct 31, 2011 4:35:35 GMT -5
I guess I should've written this prelude to the pottery title first, but better late than never, they say.
Years ago I used to hunt arrowheads around here in Middle Tennessee. Sometimes when you find them you find pottery shards or small broken pieces. I was always curious about how those early tribes made such nice things with what I assumed was few tools, mostly just hard work. Flint-knapping was easy to learn once you get the hang, but pottery was more of a challenge. Somehow just knowing that many tribes from all over the world, really, made nearly the same thing just different designs got me thinking I must be at least as smart as a caveman. (yet to be proven, lol.) After a little research I came up with a way to turn local clay into something like a pot or a pipe. This will be a long thread about making a tobacco pipe from clay in my flower bed.
|
|
|
|
Post by rockhound on Oct 31, 2011 4:40:53 GMT -5
So after digging up my crowded daffodil bed, I found the sub-soil was pretty hard clay. I wanted to dig out a little and add some organic matter before re-planting. I saved the clay separate from the other dirt in a bucket and decided to attempt a small firing of maybe a sculpture or tobacco pipe, depending on the size of the clay ball after purifying. I levigated the clay soil in a 5-gal bucket of water. There was maybe 4-5 inches of clay is all and filled up to about 4-gal mark with water. Of course when the dirt is all dissolved the gravel goes to the bottom right away. Very little organic stuff floated to the top but I poured it off any way. Then I poured the water with dissolved clay into another bucket. I let this settle over night and poured off most of the water. Since I didn't have a siphon hose, the clay wanted to pour off too, so you have to be careful. Let sit again a few hours and try to pour off water. Scoop out the wet clay on the bottom, (after checking that it doesn't have too much sand to deal with) and put the mess in a bowl lined with denim. Tie up the corners to drain.
Meanwhile I have reserved a small sample of the clay for testing and if that goes ok then I'll grind that to use for "grog" or temper to improve the firing process. I made 4 finger-like pieces of clay and dried them and fired them. So far so good. Hopefully this will be clear enough that someone else will be able to follow along and make yourself something from "found" clay. It's everywhere but unless you have a riverbank it's usually mixed with sand, silt and gravel but they can be removed. It's a lot of work but gets easier the second time around. The materials are cheap, just earth, fire, water, and your spare time.
I have never bought any tools especially for clay work, just re-purposed a few things around the place. Later, when everybodies' awake, I'll post a picture of the rough lump of clay I made last evening to sculpt a pipe out of. The sample pieces I fired first, then crushed and separated out the dust faction, you don't want that. I just hammered the test pieces to death then I used a screen wire to pass everything threw and get "30-mesh" grog and then blew away most of the dust. Then pressed out enough clay for my project and sprinkle the grog on top. fold over again and again till it's all mixed in. This also mixes in air which you have to remove or it causes explosions in the firing so you slam the clay down a few times as hard as you can. I used a piece of denim (old pants leg) on a board to slam onto. You see little places where the air pockets blow out so you know you're done with this step.
|
|
|
|
Post by rockhound on Oct 31, 2011 5:01:49 GMT -5
I should have said I only fire my pottery stuff with wood, the old way I guess but it keeps me connected to the old people more (in my mind, lol). I put the test pieces in a soup can that had been burnt out first in the firepit. Just set them on top of the coals and add a lot of small wood all around to get really hot. Since they were just a test I dried them a little in the sun but for a finished piece you need to dry it by the fire to make sure all the water held in chemical bonds is out so it won't blow up when you turn up the heat. More later  |
|
|
|
Post by rockhound on Nov 1, 2011 7:08:56 GMT -5
Here's the picture of the lump of clay with only a rough shape, to be carved into a smoking pipe when it gets dry enough to handle. I have poked 2 holes in it, one from the top for the bowl and the other for the stem. I learned it's a lot easier to enlarge a hole than to drill one straight when the clay is more dried out. These 2 holes have to intersect of course in the finished pipe. I won't smoke this one (don't smoke) but I'll add a stem and maybe a feather or two and hang it on the wall. 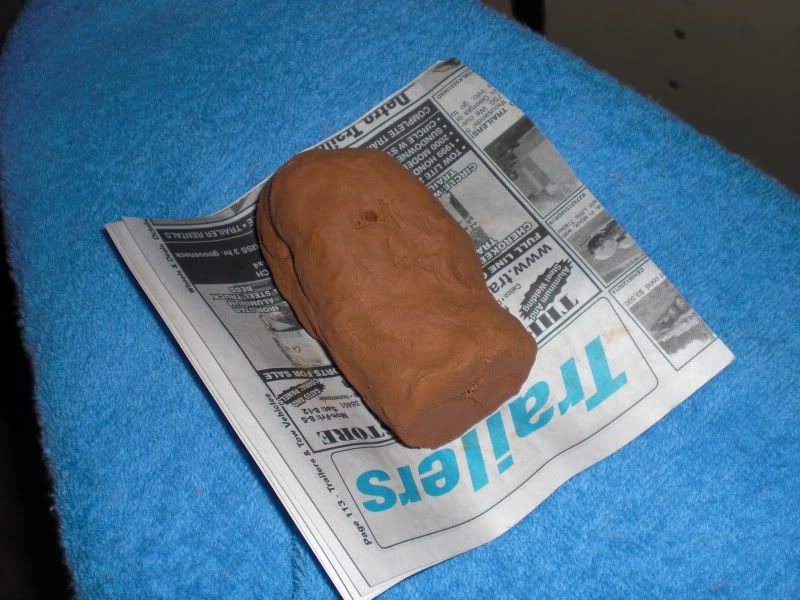 |
|
|
|
Post by rockhound on Nov 2, 2011 18:19:13 GMT -5
Here the lump is getting drier and shrinking. 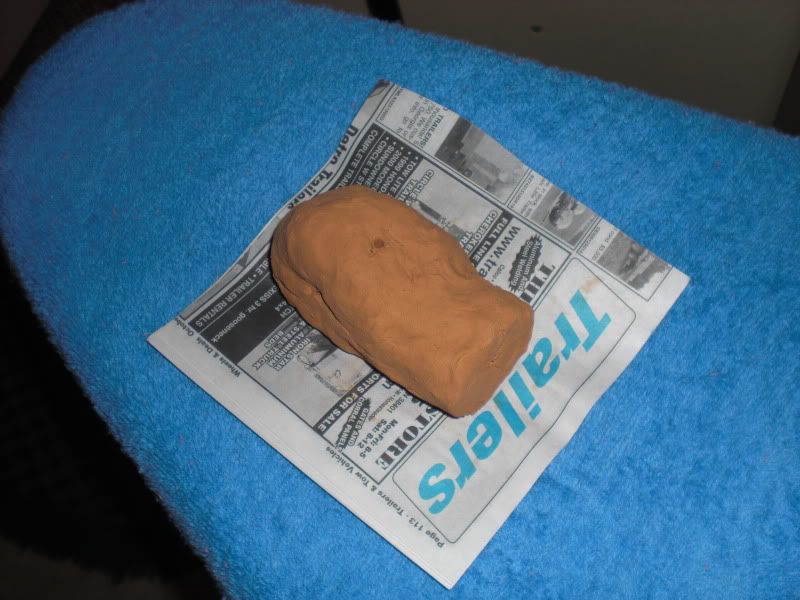 |
|
|
|
Post by rockhound on Nov 2, 2011 18:22:58 GMT -5
And here is a pic from today. You can see the clay is getting a lighter and shrinking. I ran over it with an old wood rasp to smooth it somewhat. I have to work outside on this project, pretty dusty, so tomorrow if it's rainy like they say I might not get much done. 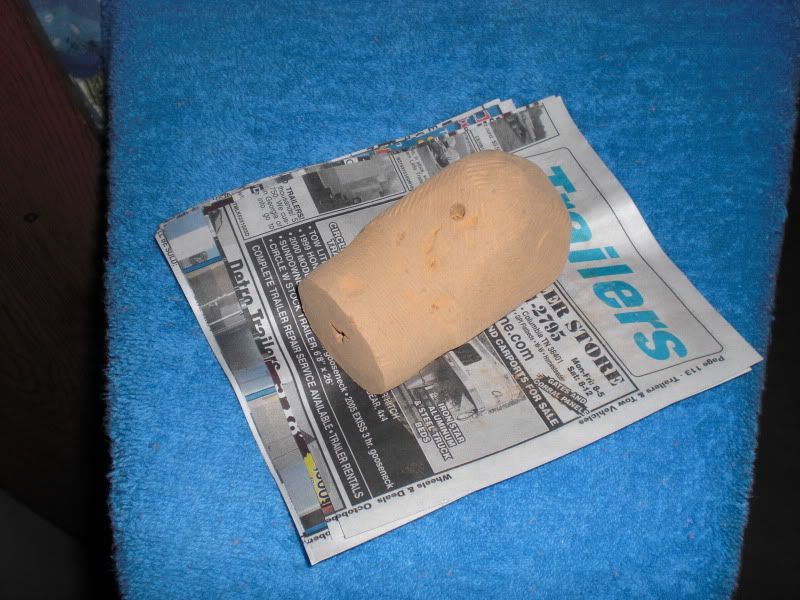 |
|
|
|
Post by rockhound on Nov 6, 2011 6:54:23 GMT -5
Well....that crease on the left side of the pipe has led to a void as I removed material to make the head of the pipe. So what I'm saying is after not touching any clay work for 10 years or thereabouts I messed up. I will have to start over with another lump of the clay I have already processed, good thing I had extra, lol. Plus I really let it get too dry. Carving is so much easier when the clay is in the "leather-hard" stage, as they call it. At that stage you can add on a little piece if needed. If it get's completely dry, ya can't. I didn't want to do any more work on that piece if it has a good chance of blowing out in the fire. A small set-back is all, I will make another ball today and put it where it will dry slower.
|
|
|
|
Post by Pharmerphil on Nov 7, 2011 6:52:31 GMT -5
very interesting Rock, ain't done anything like that since I was a boy...I have a good friend, an art major who now lives in Colorado, he used too, and I imagine still does, collects and mixes his own cly for his pottery.
Clay pipes have been found by a good friend of mine in s.e. Iowa, he is a agressive arrowhead/artifact hunter...has many arrowheads listed in the publications that he has found...
Just a few niles, well actually about 2 hours west of here is Pipestone Mn., where all tribes harvested their Catlinite for peace pipes, I have had a few large and some small pieces...have made a couple piece pipes for display...
|
|
|
|
Post by rockhound on Nov 7, 2011 10:00:08 GMT -5
Yeah it's strange that pipestone only occurs there. I've never seen it, but there's a lot I ain't seen, lol. Here's the latest pic, of the second ball of clay. I made it into a rough shape and dried it overnight, then this morning sat out in the sun for a bit and sketched in a few lines for the carving. I can tell already that my "temper" (crushed, fired clay) that I added was a tiny bit too large but it'll work. Amazing how much a person forgets in not touching something for 10 yrs. I guess I thought it'd be like riding a bicycle. 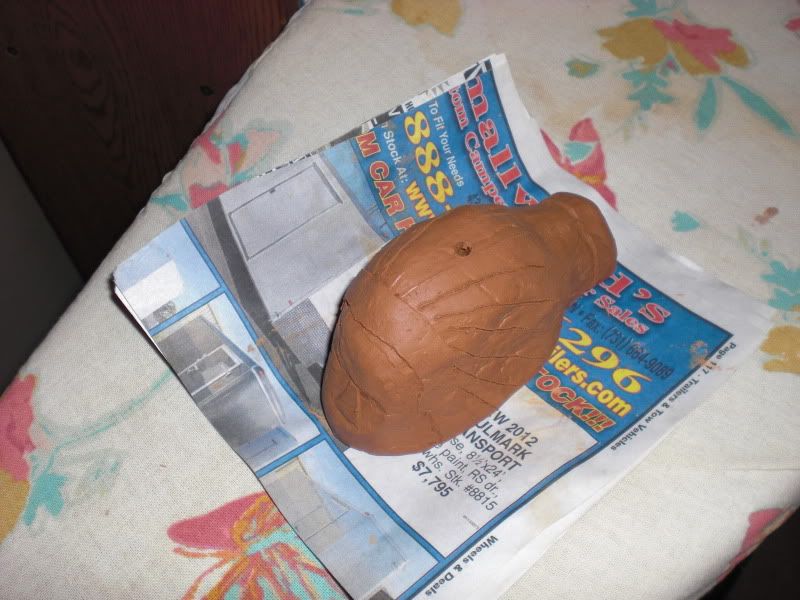 |
|
|
|
Post by rockhound on Nov 9, 2011 16:25:17 GMT -5
Well it got too dry again, dern AC. I will just have to deal with it. I started scratching out a few of the borders for the feathers. All I have left to do is re-drill the holes to the right size and take off all the clay that don't look like a guy in a war bonnet.... 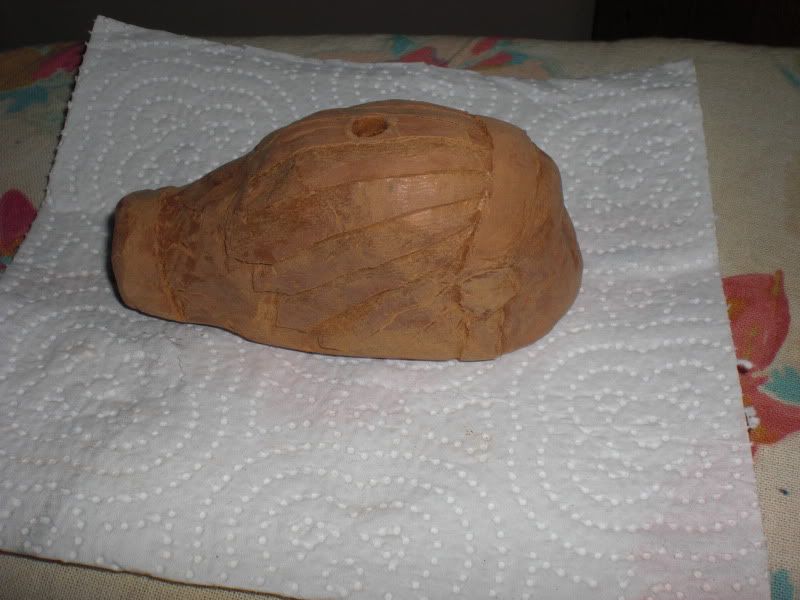 |
|
|
|
Post by rockhound on Nov 11, 2011 16:05:19 GMT -5
Worked on the pipe a little today, Veteran's day. It still has a way to go and I need to re-sharpen my carving tool, lost it's edge.  |
|
|
|
Post by rockhound on Nov 11, 2011 16:06:51 GMT -5
|
|
|
|
Post by rockhound on Nov 14, 2011 11:55:13 GMT -5
Well I went over the lines some more. My hands cramp up after just a little while is why I don't do much in a session. I did drill out the bowl with a 5/8 spade bit, just turning by hand. The top edge chipped out a little so will bevel it to that level all the way around. I can see the light at the end of the tunnel now, at least lol. 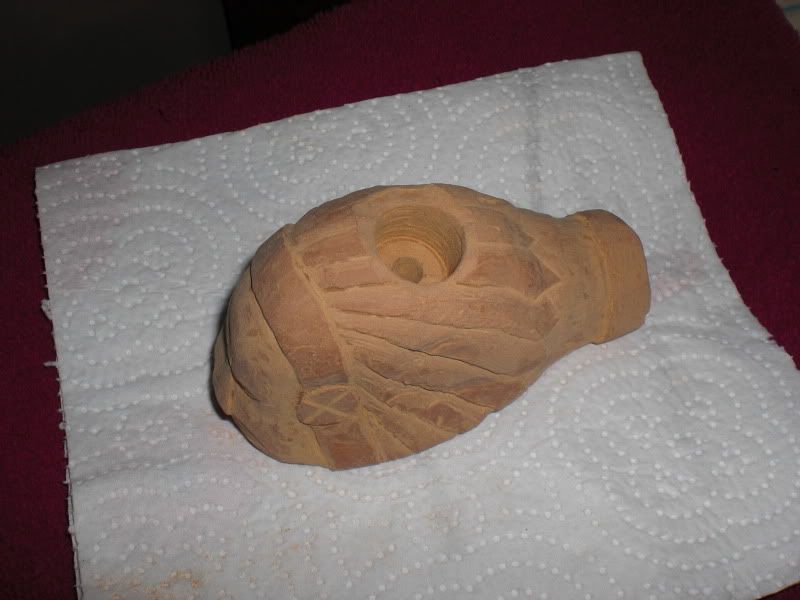 |
|
|
|
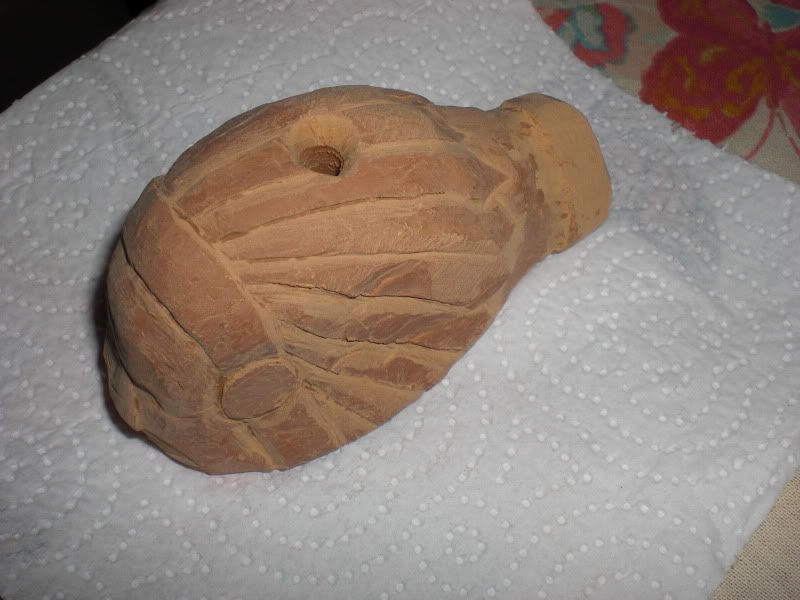
Post by rockhound on Nov 16, 2011 19:33:16 GMT -5
Here's the pipehead, as complete as it's gonna be but un-fired. The shiny and black-looking spots are just where I ran the burnisher over it. Not much strength in my hands now, you have to really bear down on those things to get an even finish, oh well. Now after I fire this thing, and assuming it comes thru in one piece, I'll add a pipe stem and maybe a few beads or feather for decoration. Just something to hang on the wall. 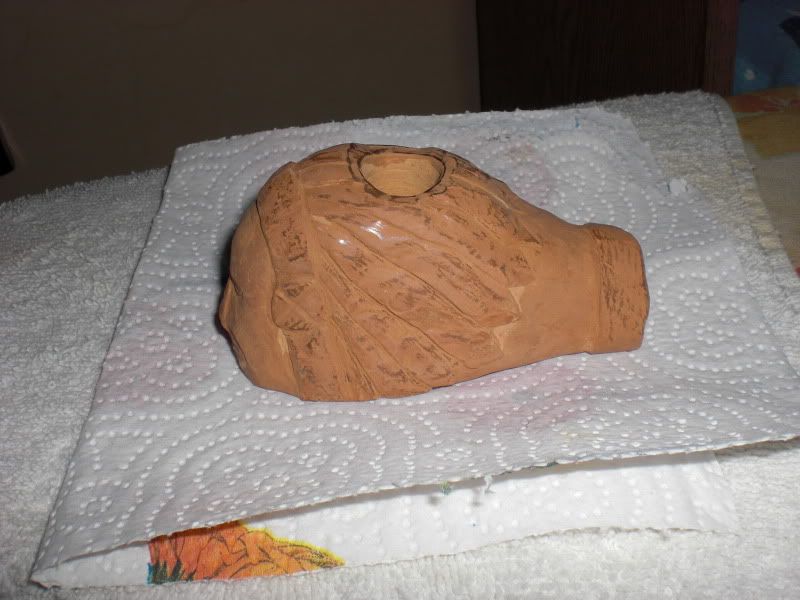 |
|